
How to Create Wedding Stationery with Clipart Graphics in Canva
Canva is a free online design and publishing tool that you can use to create digital items such as invitations, wall art, and social media content. If you’ve not used it yet, you can head to https://www.canva.com to sign up and try it out. It has a free tier that includes loads of features.
We're going to create a design for a little wedding details card, using some ready made clipart. The graphics we’re using are from our Greenery set - we’re going to use a wreath and a couple of individual elements. If you’d like to buy them to follow along, you can find them here:
Greenery Wreath Number 1: https://etsy.me/3y4WADj
Greenery Foliage Set: https://etsy.me/3NkwIrL
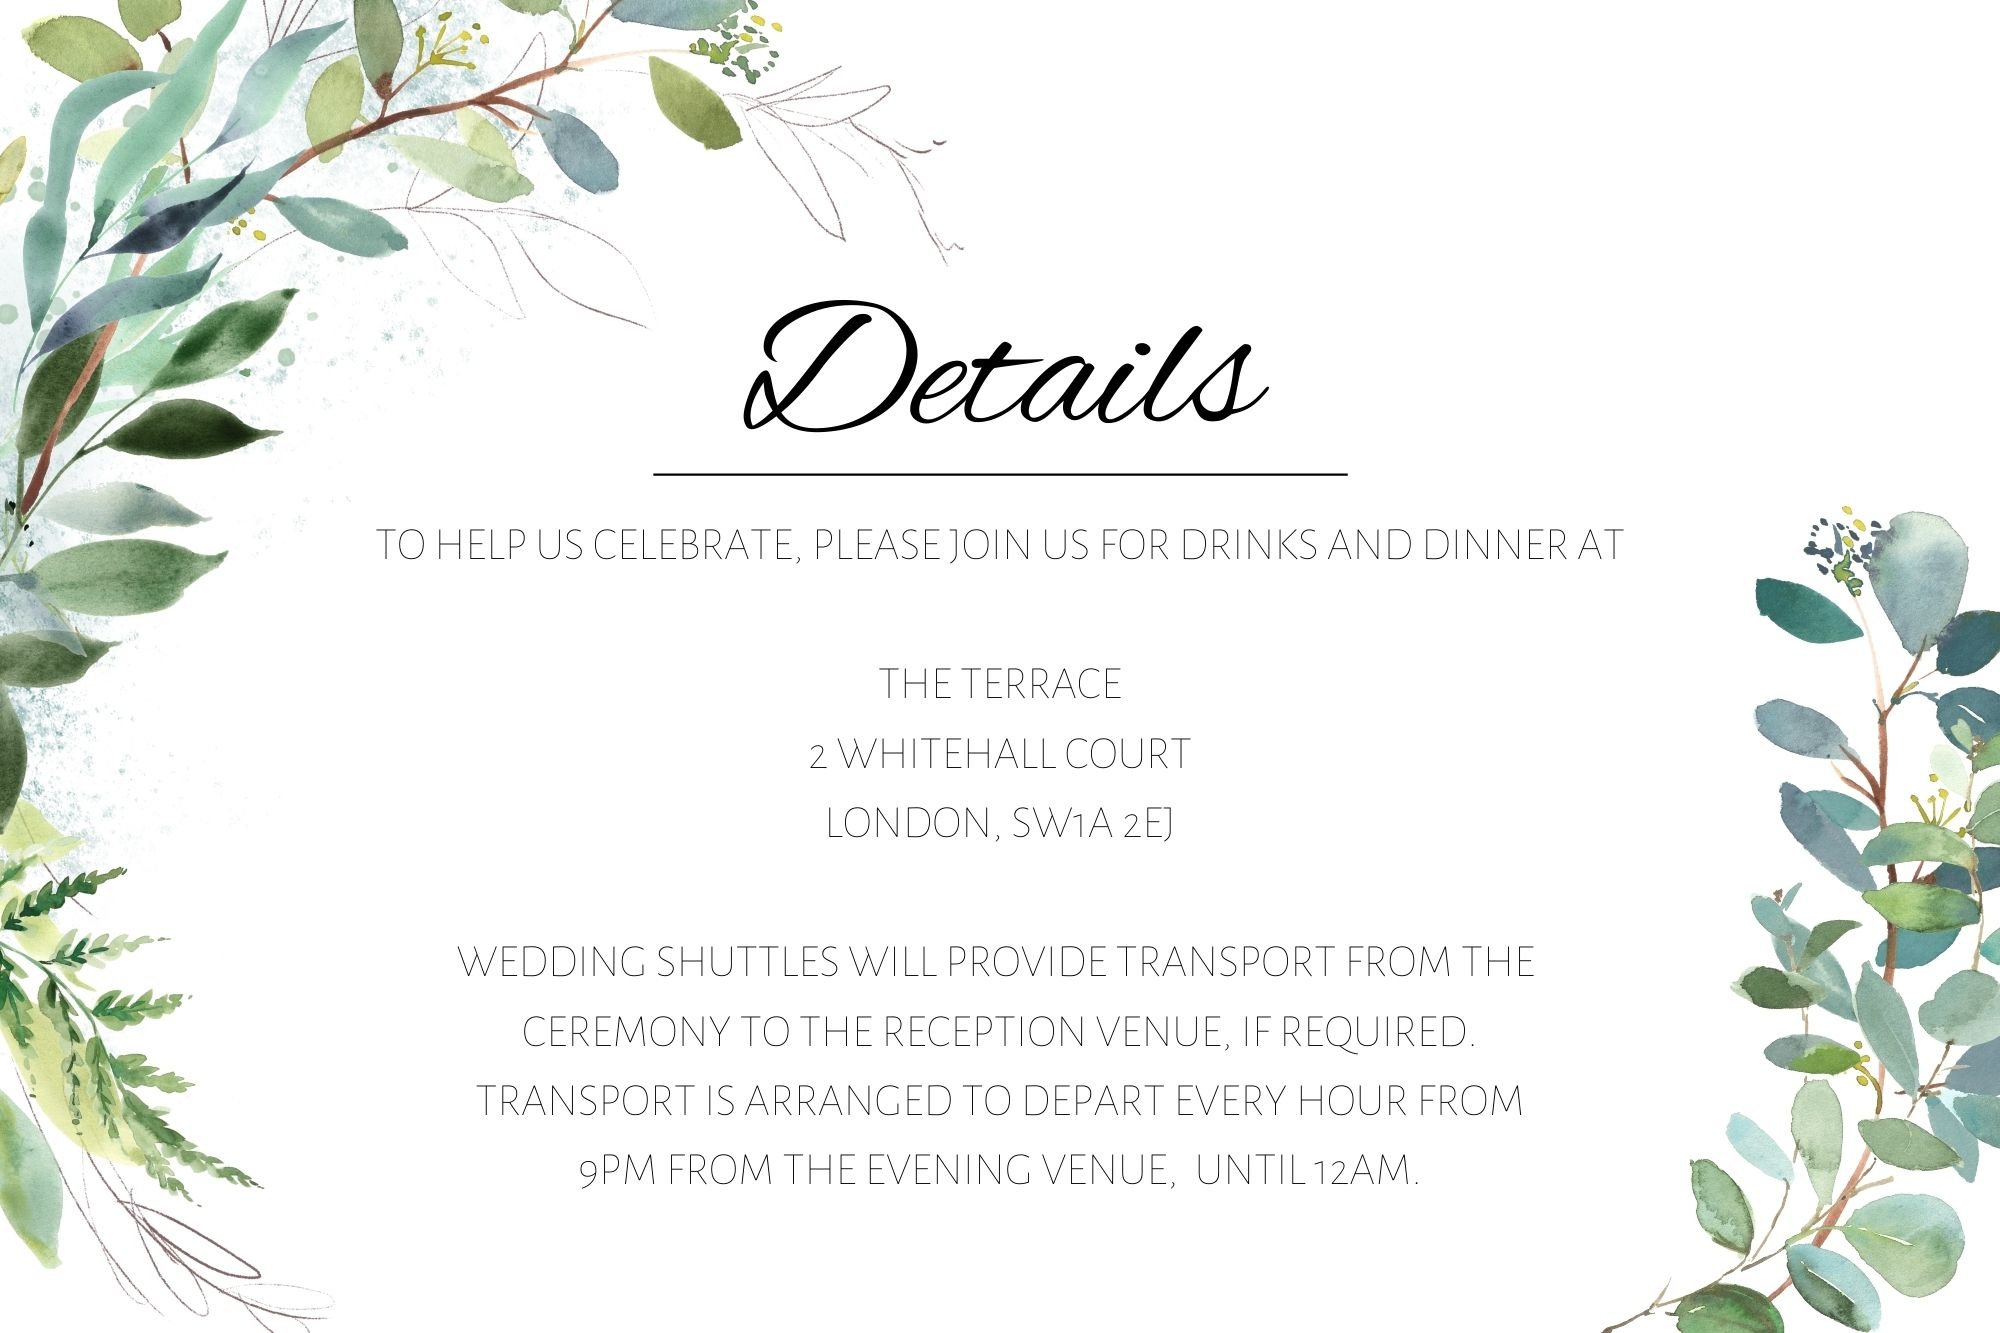
Here’s what we're going to make. It’s quite simple.
And here’s how we’re going to do it:
Set up a new design
Create the text
Draw a line
Import the graphics
Place the graphics
1. Set up a new design

Starting a new design with Canva is easy. From your home page, just click the “Create a design” button in the top-right corner.

You’ll get a popup that asks you what you’d like to create. Canva has loads of built in templates that can save time when making one of these common things. We’re not going to do that though, we want a 6” x 9” card. So, select “Custom size” at the bottom of the list.

This brings up a dialogue for you to enter the width and height. You can do so in a number of different units. Change the units to inches and set it up with a width of 9 and a height of 6.
Click “Create new design” and you’ll be taken to your blank canvas. Ah, the possibilities 😊
2. Create the text
We’re going to have two bits of text here. There’s the title - “Details”, and the body text. Let’s do that title first.
You should notice that on the left-hand side of the window there’s a tools pallet from where you can access templates, elements, uploads and more. In there is the button for adding text.
Click that button and you’ll have the option to add a Heading, a subheading, or a little bit of body text. Click the button to add a heading. This immediately adds a big bit of text in the middle of your design.
Change the text to “Details” and then click anywhere else on the canvas. Now you can click and drag it around the page, or click it to select it, and then use the arrow keys on your keyboard to move it. If you click it again when it’s already selected, you’ll be able to edit the text.
Let’s change the font. With the text box selected you’ll see various text formatting options along the top of the window, including a font drop down menu.

If you click this, it will actually open a panel that shows you each font rather nicely. The ones with the crown icon by them are only available on a paid plan.
Select the font you like. I went for Alex Brush.
Now for the body text. Follow the same process.
Click the text button
Click “Add a little bit of body text”
Type in your own text
Move it to where you want
Change the font
I went with Alegreya Sans Thin for the body.

You might find that the text box is too narrow, and doesn’t automatically get wider as you type. That’s fine, you can manually widen it by dragging on the little side grabby handles when it’s selected.
I’ve also decided to make the body text all capitals. There’s a handy little button in the text formatting bar to do this.

3. Draw a line

Ok, so this is just a line, but it’s worth having a look at the built in elements that Canva provides. In this case, we just want a line underneath the “Details” title.
In the toolbox on the left, select “Elements”, and then click on the line.
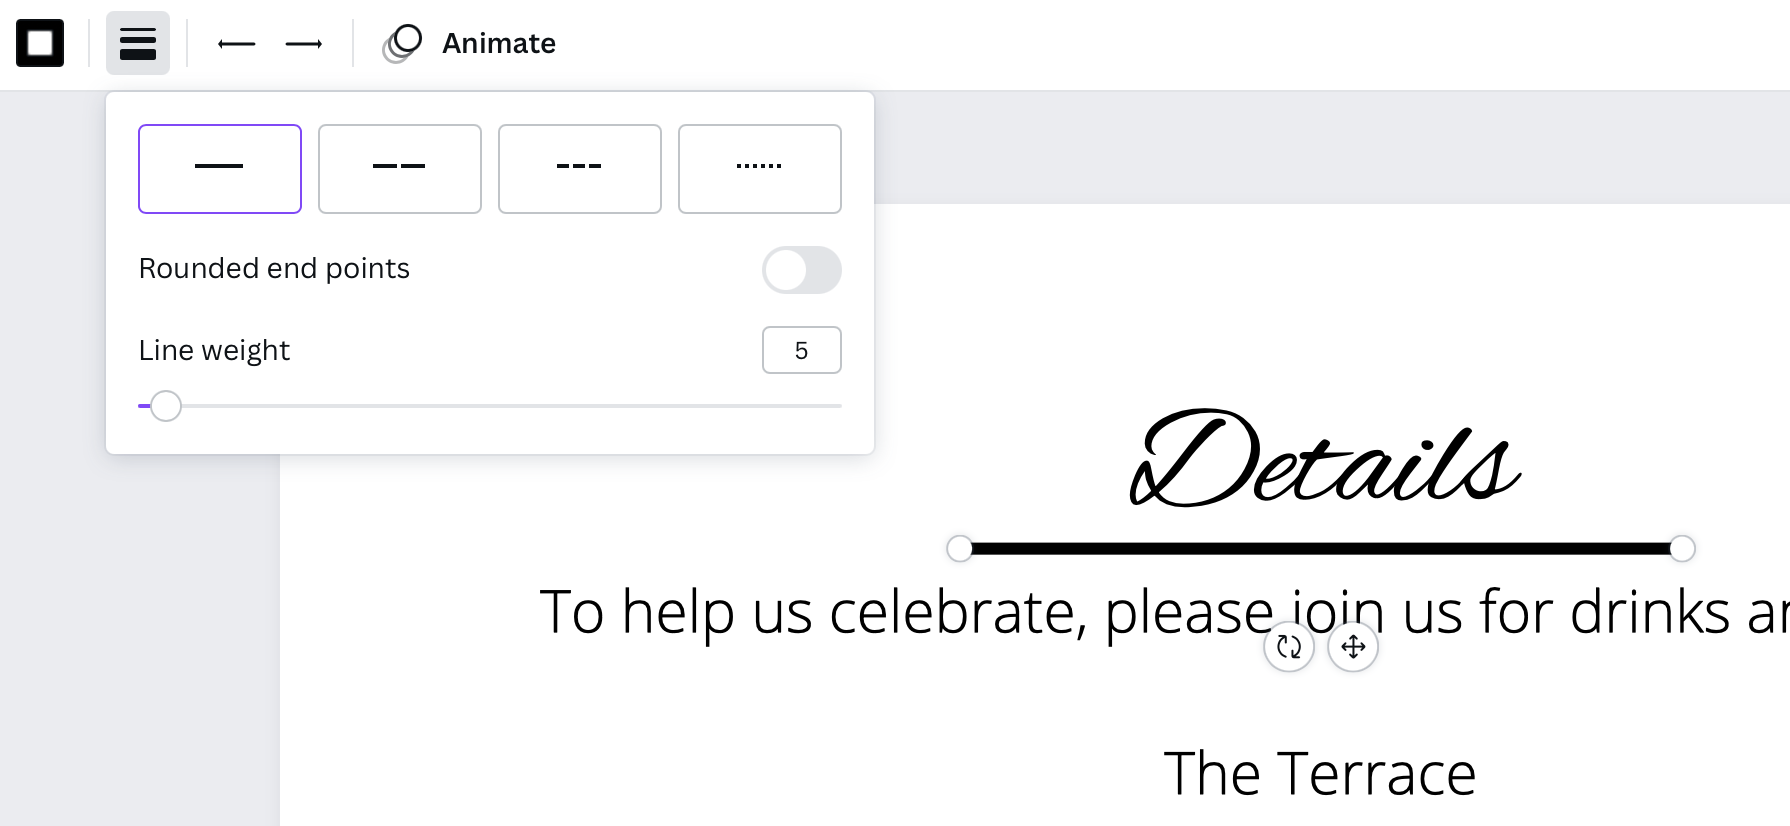
This will pop a black line in the middle of your design. Move it underneath the “Details” title. We want it to be thinner too. With the line selected, you’ll see some formatting options along the top. Click the one with several horizontal lines. This opens up a little panel that lets you change a few things about the line, including its thickness, or weight.
Change it to something nice, maybe 1.
4. Import the graphics
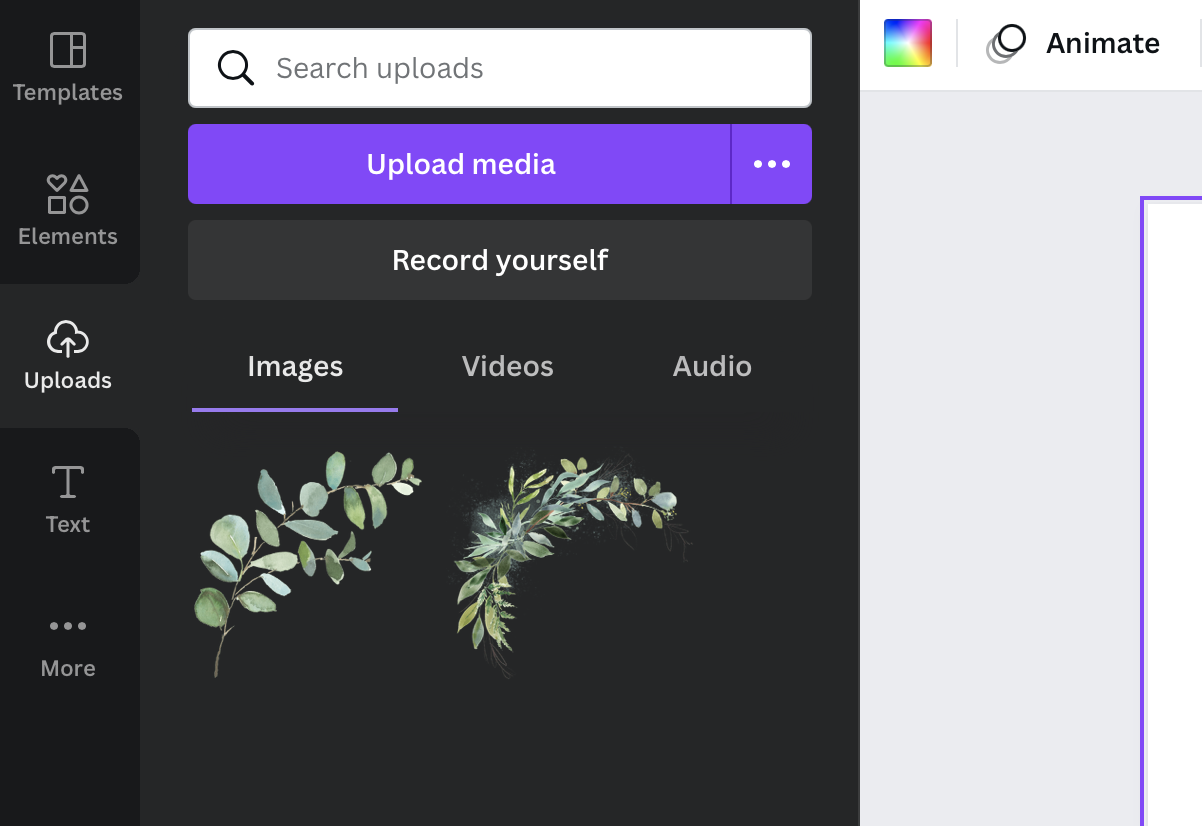
Now we’re getting into the good stuff. In Canva, you can upload your own graphics to use in your designs. PNG graphics work particularly well as their transparent background means you can layer them up.
Click the “Uploads” button in the toolbox on the left. This will open a panel that contains all the graphics you’ve uploaded, and a big button to upload more. Click that “Upload media” button.
This will open up the normal file explorer dialogue for your system. Select your graphic and click the “Upload” button in the file dialogue.
For this design, I’ve uploaded one partial wreath, and two single branches.
A Note on Resizing Image Files
Canva has a 25MB file size limit. If your image is larger than this, you’ll need to use something else to reduce the size. This is most easily done by making it physically smaller - that is, reducing the height and width. If you’re on a Mac, you can do this with Preview. Just load it up, and then go to Tools → Adjust Size… You can then resave it as a PNG file and all should be well.
If you’re on Windows, it looks to me like you can use Paint 3D, the successor to Paint to do this. You might be able to use Paint too. Here’s an article that might help: https://www.howtogeek.com/354015/how-to-resize-images-and-photos-in-windows/
Whatever you do, make sure you resave the image as a PNG to preserve the transparent background.
4. Place the graphics

Now that you’ve got an image loaded into Canva, it will be shown in that “Uploads” panel you’ve got open. If you click it, Canva will pop it into the middle of your canvas. It will be selected, with resize and rotate handles. You can also click and drag it to where you want it.

Now it’s just a case of resizing, rotating, and moving it into place. I went with something like this

I’d like to have just a couple of overlapping branches in the bottom right corner of this design. Click on one of the branches in the Uploads panel to add it to the design.

It curves in the wrong way for the bottom right corner. Fortunately, we can easily flip it with the “Flip” button in the top formatting bar.

In this case, we want to flip it horizontally. Resize, rotate, and reposition to the bottom right corner.
Canva lets you do a lot more than this with images though. Click the “Edit image” button that’s at the left of the image formatting menu and you have access to a panel of powerful image editing features.
We’re going to add the second branch. Follow the same process.
Click the branch in the Uploads panel to add it
Flip it horizontally
Rotate, scale and reposition into place

By default, Canva stacks elements in the order in which they are created on the canvas. However, you might want to change this. With an image selected, notice that towards the right hand end of the formatting bar there’s a “Position” button.
Clicking this opens up a little dialogue that lets you change the positioning of the image, including where it sits in the stacking order.
If you click “Backward”, this will send the graphic one layer backward, until it’s behind the other branch.
A couple of tips

You might have graphics that you accidentally keep selecting and moving, when you’re really trying to select something else, like some text that’s sat behind it. You can stop this from happening by locking the graphic. With an image selected, there’s a padlock symbol in the top right corner. Click that and the image is locked and can’t be moved by accident.

We added a couple of branch graphics. It’s useful to be able to move them around together. This can be made easier by grouping them. You can select multiple elements by holding down the SHIFT key as you select them.
You’ll see a “Group” option appear in the top formatting bar. Click this and the objects will be grouped together so that you can manipulate them together.
And that’s it
I hope that’s been useful. We’ve looked at
How to create a new design in Canva
Adding and formatting text
Using the Elements panel to add a line
Importing and using graphics in your design
If you found this useful, or have anything to add, I’d love to hear from you.